Instructions
🎉 You're Almost There!
You’re only three quick steps away from unlocking macroeconomic alerts that empower you to manage risk with clarity and confidence
📌 Before You Begin:
For best results, we recommend completing the setup on a desktop
Now, follow the steps below to add the Scheduled Volatility calendar to your phone or your personal calendar


Watch the video below by Amelia
To Access:
✅ Step 1: Check Your Email
Open the email with the subject: "Mr. Support has shared a calendar with you."
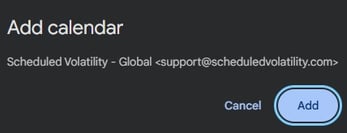
Click the “Add this calendar” button to open and confirm it in your calendar.
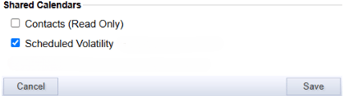
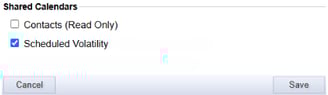
🌐 Step 2: Sync to Your Google Account
Check the box for Scheduled Volatility in the list of calendars.
Click Save, then refresh the page.
📱 Step 3: Confirm Sync on Your Phone
Open your calendar app.
Check that Scheduled Volatility appears in your calendar list (may take up to 30 minutes)
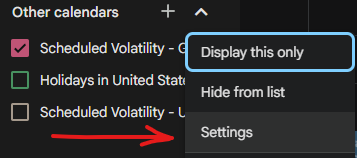
💻 For Desktop Users (Optional: Set Reminders)
Open your Google Calendar.
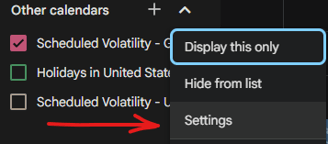
On the left panel, find the Scheduled Volatility calendar.
Hover over it, click the three dots (⋮), then select Settings.
Scroll to Event Notifications.
Add a reminder (recommended: 30 minutes before each event).
Choose either Email or Pop-up—it will save automatically

Subscribe
Get timely notifications for key financial events
support@scheduledvolatility.com
© 2025. All rights reserved